The post 【リサーチ・デザイン・実装】すべての工程をAIで進めた自社サイトリニューアルの話 first appeared on アスタWorks.
]]>
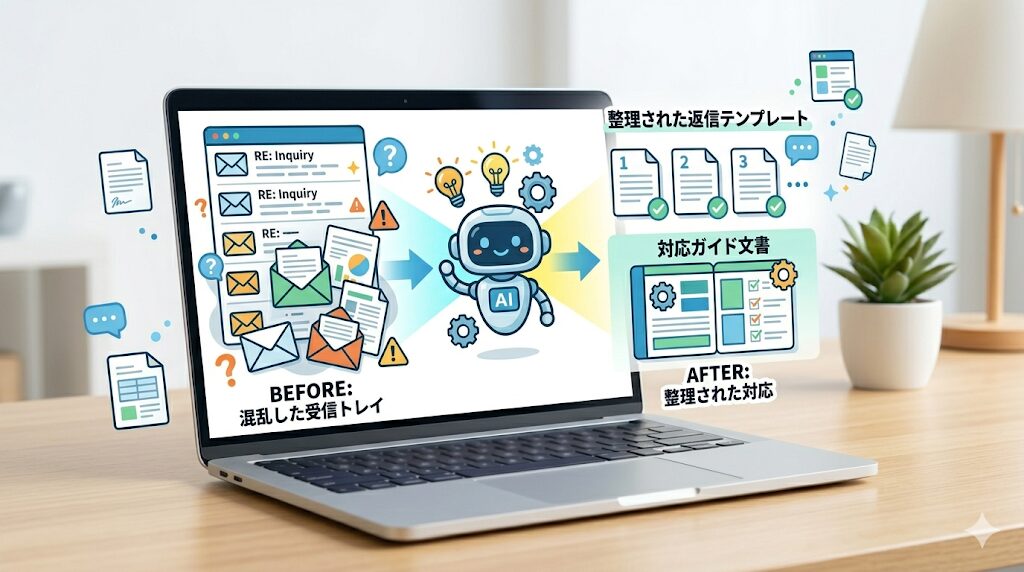
実は、、、リサーチ、デザイン、画像生成、実装——全工程AIだけで作成されています。
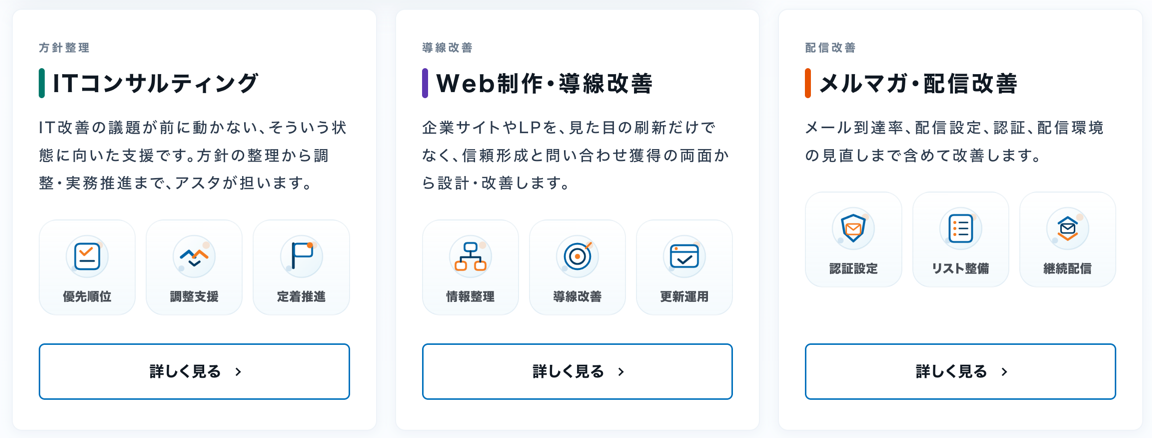
アスタはWebシステム制作/Webサイト制作などIT全般のお悩みを解決する会社です。
当然、コーポレートサイトなどゼロから作れます。
しかし、今回は手では一切コードは書いていません。
なぜAIを使おうと思ったのか、そして実際サイト制作も行う会社がAIを使うと何が変わるのか。
今回の体験をそのまま書いていきます。
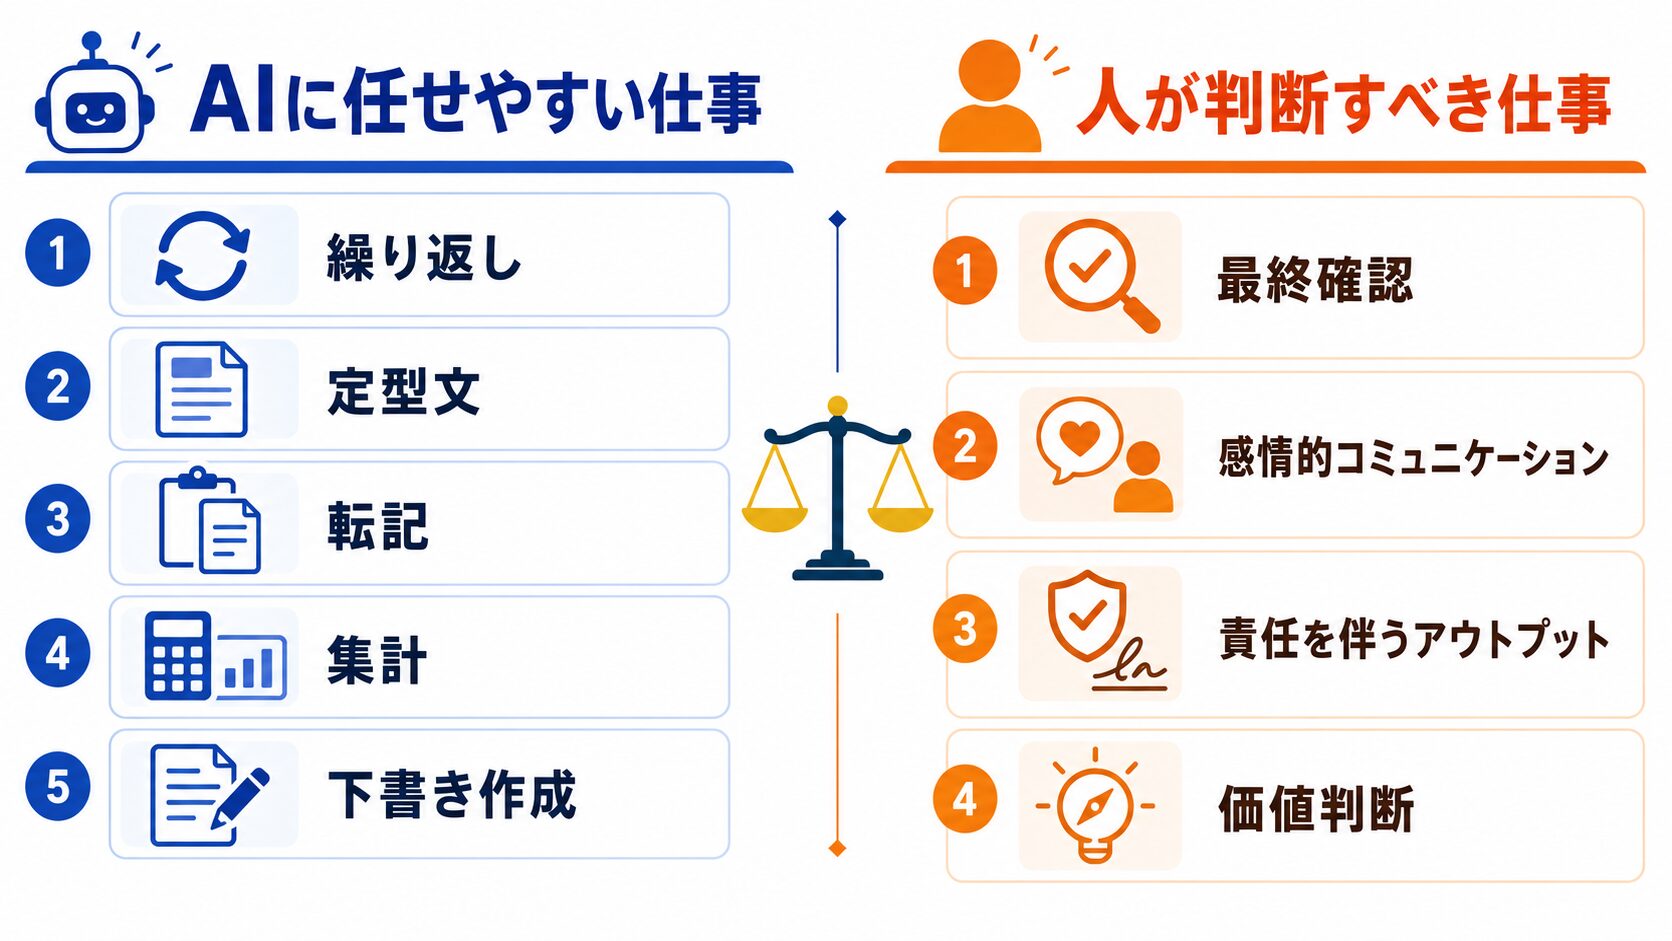
コードが書けるのに、なぜAIを使ったのか
アスタはWebサイトの制作もシステム開発もゼロから対応できる会社です。
PHPやWordPressのテンプレートをスクラッチで書くことも、CSSをゼロから組むことも、普通にやります。
「コードは自分で書くもの」——ずっとそう思っていました。
しかし、今回はそれをやめて、すべてをAIにまかせてみました。
ここ最近のAIの進歩は目覚ましく、これまでは、、、
・ショボいデザイン
・AIがよく使う人物画像
・AI独特の言い回し
など、クオリティが低くてサイト制作には使えなかった部分が解消されつつあります。
デザインは人間と遜色がないか、それ以上のものが数秒で出来てきて、効果的な構成もすべてAIが考えてくれます。
おまけに手作業では何時間とかかることも、AIによって数分に短縮できます。
実際に、手作業であれば1ヶ月はかかるであろうリニューアルも1週間ちょっとで完成しました。
でも、AIを使ったのは「速さ」だけが理由じゃないんです。
AIを使うことで「調べられる量」「試せる案の数」「判断できる精度」——これが根本から変わりました。
たとえば競合調査。手作業で何十社も調べるのは、現実的ではありません。
今回は48社のサイトを、1時間とかからずにAIが自動でキャプチャして、見やすい一覧ページを作成してくれて、並べて確認することができました。
デザインも同じように超効率化できました。
サイト制作完成形のイメージを確認するのにモックアップというものを作成するのですが、ラフとはいえこれを数種類作るのは相当大変です。
しかし、「1つだけ作って検討する」より「複数並べて選ぶ」ほうが、比較・検討がしやすく、自分たちが何を求めているかがはっきり見えます。
もし、AIを
・質問に答えてくれるもの
・画像を作ってくれるもの
・文章を作ってくれるもの
のように、ただ便利な道具として考えていると絶対に損です。
いまのAIは、
・高度な分析をしてくれるアナリストであり、
・誰が見てもキレイなデザインと導線を作ってくれるデザイナーであり、
・超短時間で指示通りコーディングができるプログラマー
として、すべて一人でこなす超絶優秀な部下でした。
今回の制作フロー:リサーチ → デザイン → 実装
今回のリニューアルは、3つのフェーズで進めました。
| フェーズ | やったこと | 使ったAI |
|---|---|---|
| STEP1 リサーチ | 競合・ベンチマーク48社のサイトをキャプチャ・分析 | Codex |
| STEP2 デザイン | コーポレートサイトのデザインモックアップを17案生成 | ChatGPT image 2.0 |
| STEP3 実装 | WordPress CSS調整・PHPテンプレート生成・一括修正 | Claude Code × Codex |
ちなみにCodexは「コードを書くAI」と思われがちですが、それだけではなく、
・競合サイトの自動キャプチャ
・画像の自動作成
・現行サイトの現状分析
・リニューアル要件の整理
・静的ワイヤーフレームの制作
こういう作業もすべてやってくれます。
今回も制作の上流から下流まで、全部の作業に入ってもらっています。
STEP1:競合48社のサイトを、AIで1時間かからず全部調べた
まず最初に取り組んだのは、自社サイトの現状整理です。
「今のサイトで、何が伝わっていないのか」——ここを整理しないと、見た目だけ変えるリニューアルになってしまいます。
Codexに既存サイト(astha.jp)の全ページをクロールしてもらい、テキストをMDファイルとして保存。
「要約ではなく、忠実に抜き出したテキストも含めてほしい」と指示することで、精度を上げました。
続いて、競合・ベンチマーク48社のサイトを自動キャプチャ。
・和製ハイエンドIT企業(モンスターラボ、クラスメソッドなど)
・士業・コンサル型(リブ・コンサルティングなど)
・海外勢(IDEO、Accentureなど)
・インタラクティブ体験型(ライゾマティクス、BIRDMANなど)
など11カテゴリ、計48社。キャプチャ成功率は47/48社(約98%)です。
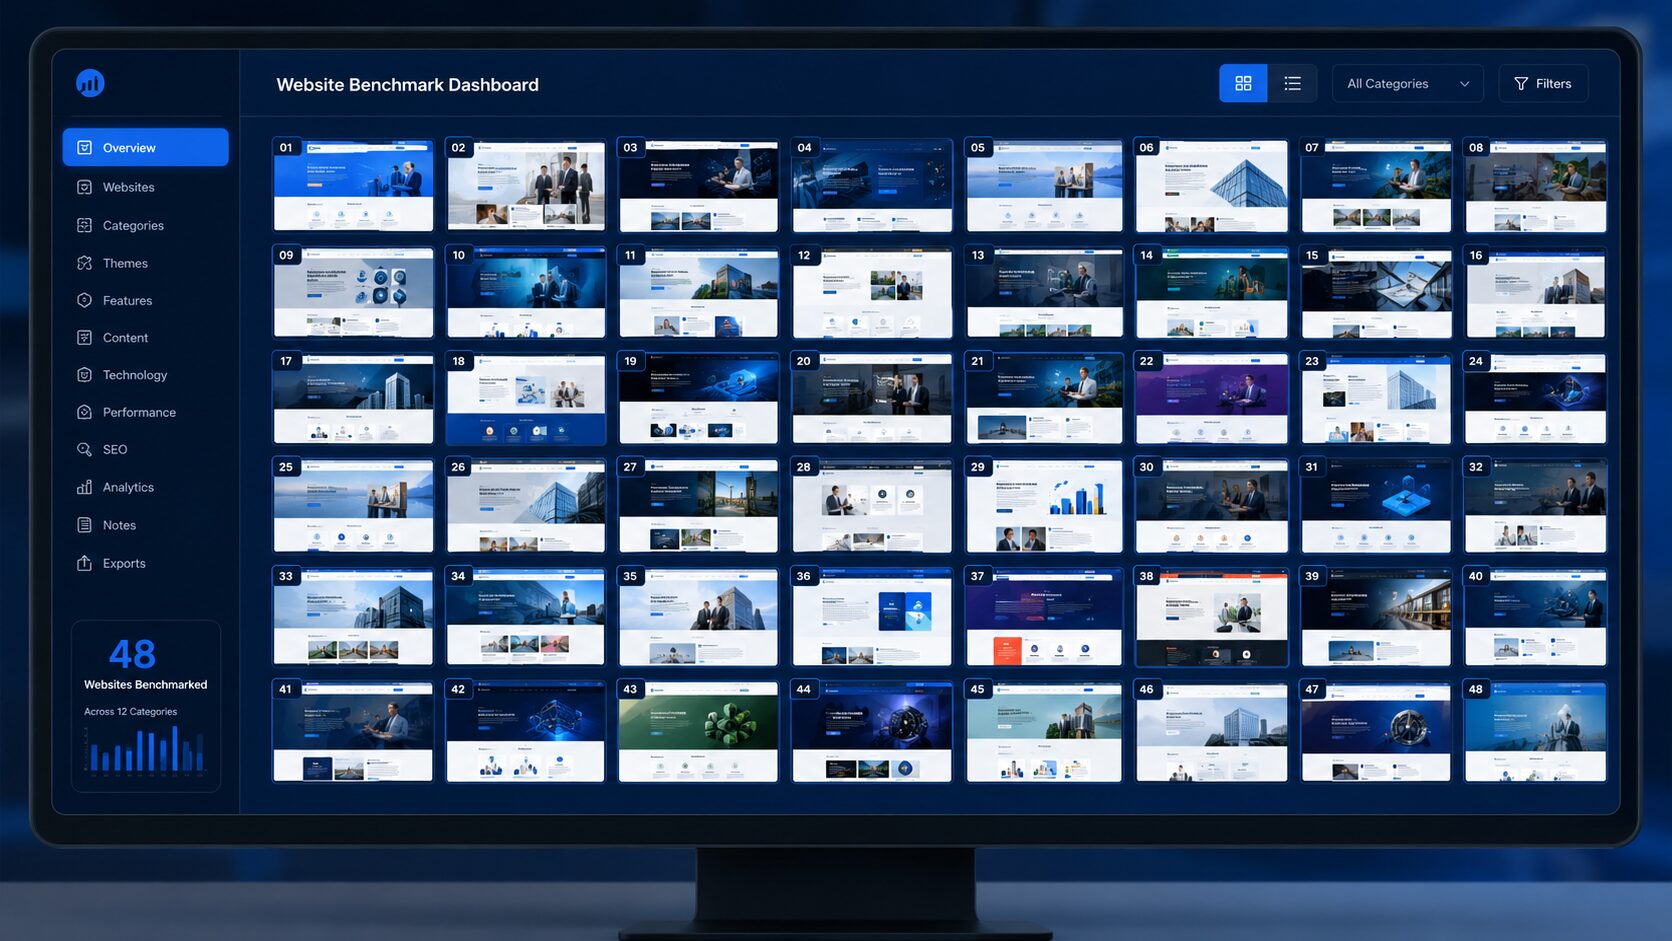
これだけ並べて比較できると、「自分たちがどこを目指すべきか」が、かなりわかりやすくなりました。
やはり比較する量が多いほど、判断の精度が上がりますよね。
同じような、競合調査、市場調査、事例収集などなど、、、「調べたいけど時間がない」と後回しにしていたことでもAIを使えばあっという間にできると感じました。
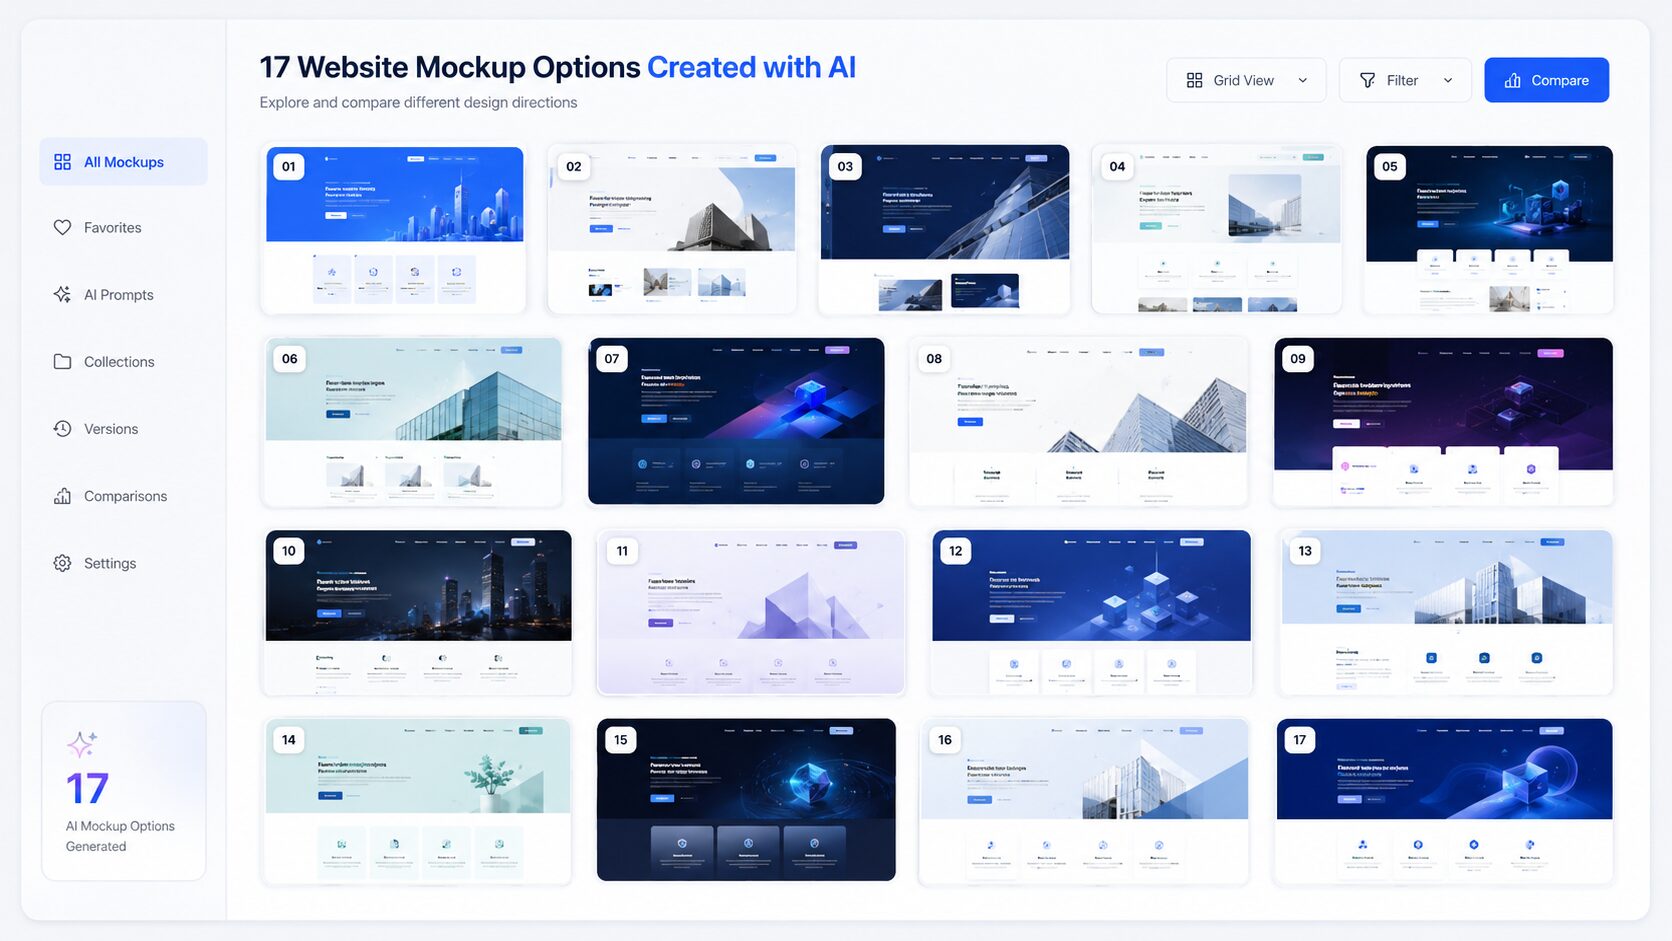
STEP2:デザイン案を17個、AIに出させて並べて選んだ
続いて、ChatGPT image 2.0でデザインモックアップを17案生成しました。
正直、17案で終わりではなく、もっと作ることもできましたが、キリがないのでやめたって感じです。
最初は10個くらいにしようと思っていたのですが、あまりに簡単にできてしまうので、面白くなってつい増えてしまいました^^;
・青・白系(清潔感・信頼感)
・濃紺系(重厚感・専門性)
・サイドナビ型(独自レイアウト)
・ティール系・ラグジュアリー系・グリーン系・ダーク系
色ごと、レイアウトごとに全部違うデザインが並んできました。
しかも、各バリエーションにコピー案まで自動でついてきます。
パッと見てイメージが比較できるので、方向性が決めやすいです。
しかも、右上に絞り機能もついているのがすごくないですか?
これもAIが勝手にやってくれました。
「1案作って検討する」より「17案並べて選ぶ」ほうが、判断の速さも精度もまったく違います。
ただし、AI生成はあくまでたたき台です。
「これは自分たちらしいか」——この判断は、人間がやる部分ですので、ここからどういう方向性でいくかを決めていったわけです。
STEP3:実装はClaude CodeとCodexで。AIと人間の役割分担
実装フェーズでは、Claude CodeとCodexを中心に進めました。
なんで2種類も使ったのかというと、
・どちらが使いやすいかを調べるため
・明確に作業領域を分けるため
・1つだけだとトークンが足りなかったため・・・
などの理由からです。
実際に使ってみて、Codexの方が優秀な回答や成果物を返してくることが多いなとは感じました。
ただ、この2つは今も現在進行系でものすごいスピードで進化しているので、明日には評価が逆になっている。なんてこともありえる話です。
で、作業については「AIが全部やってくれた」わけではありません。
私とAIで明確な役割分担がありました。
| AIが担った部分 | 人間が担った部分 |
|---|---|
| CSSの調整・修正 | デザインの方向性・トーン |
| 繰り返しパターンのコード生成 | 仕様と品質の最終確認 |
| 複数ファイルをまたいだ一括修正 | 「何を作るか」の設計 |
| バグ原因の診断・修正案の提示 | 選択・判断・最終指示 |
とはいえ、上記の通り私は一切コードに触れていません。
細かい修正もすべて指示をすることによって直させて進めています。
また、デザインの方向性とか何を作るか、選択・判断部分についても、たたき台やアドバイスをAIにまかせています。
なので、実際人間の担った部分にもAIはかなり活用しているって感じです。
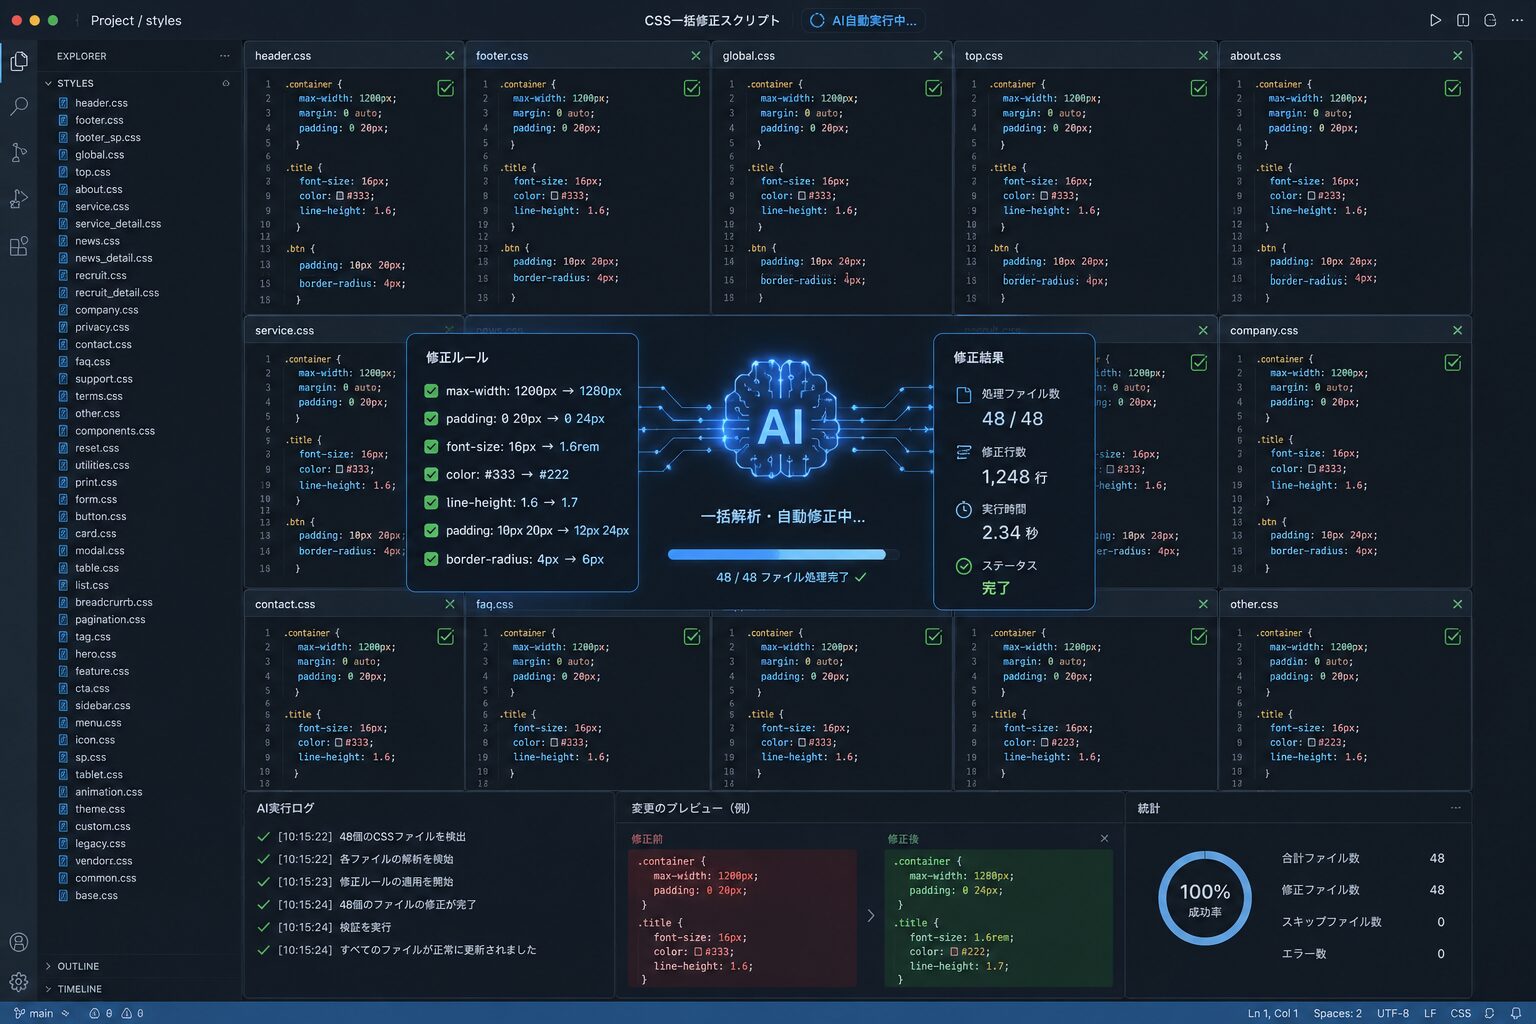
65箇所のCSS指定を、数分で一括削除
ある程度出来上がったあとに、サイト全体のletter-spacingを0.16emに統一したかったのですが、個別指定が65箇所あって全体指定が効かない状態でした。
手作業だったら?丸1日かかります。←ちょっとオーバー
しかし、AIにPythonスクリプトを作ってもらい、全CSSファイルを解析して一括削除。
ものの数分で完了しました。
「繰り返し・大量・定型」——この3つが重なる作業こそ、AIが最も力を発揮します。
AIの提案を、4回断った
AIが作ってきたデザインもすべてそのままOKではありません。
今回、トップページの「サービス一覧」のカードデザインを、4回作り直しさせました。
最初の提案は「カードの端に色をつけるデザイン」。
わかる人にはわかると思いますが、これはAIがよくやりがちなデザインです。
2案目、3案目と試すたびに「違う」「ダサい」「自分たちっぽくない」と却下。
最終的に、6px幅の左ラインに落ち着くまでに4パターン試しました。
こういう試行錯誤をすばやく、カンタンにできるのもありがたいです。
でも「これは自分たちらしいか」の判断は、人間にしかできません。
この往復が、品質を決めるのだと感じました。
結論:AIを使うと、何が変わるか
今回のプロジェクト、数字で見るとこうなります。
| 指標 | 数値 |
|---|---|
| ベンチマーク調査社数 | 48社(11カテゴリ) |
| デザインモックアップ案数 | 17案 |
| 作成したPHPテンプレートファイル数 | 約20ファイル |
| 一括削除したCSS letter-spacing宣言数 | 65箇所 |
| プロジェクト期間 | 1週間ちょっと(4月28日〜5月12日) |
でも、数字より大きかったのはこっちです。
・調べる量が増えて、判断の精度が上がった
・試せる案が増えて、「自分たちが何を求めているか」が見えた
・定型作業をAIに任せた分、こだわるべき部分に時間を使えた
「AIで楽になった」のはもちろんですが、
「AIのおかげで、もっと大事なことに集中できた」
これがより正確な表現です。
「調べる」「たたき台を作る」「繰り返しの定型作業」——これをAIに任せると、人間は「判断する」「こだわる」「方向を決める」ことに集中できます。
プロ × AI = 役割分担が決まって、初めて機能する。
今回、そのことを改めて実感しました。
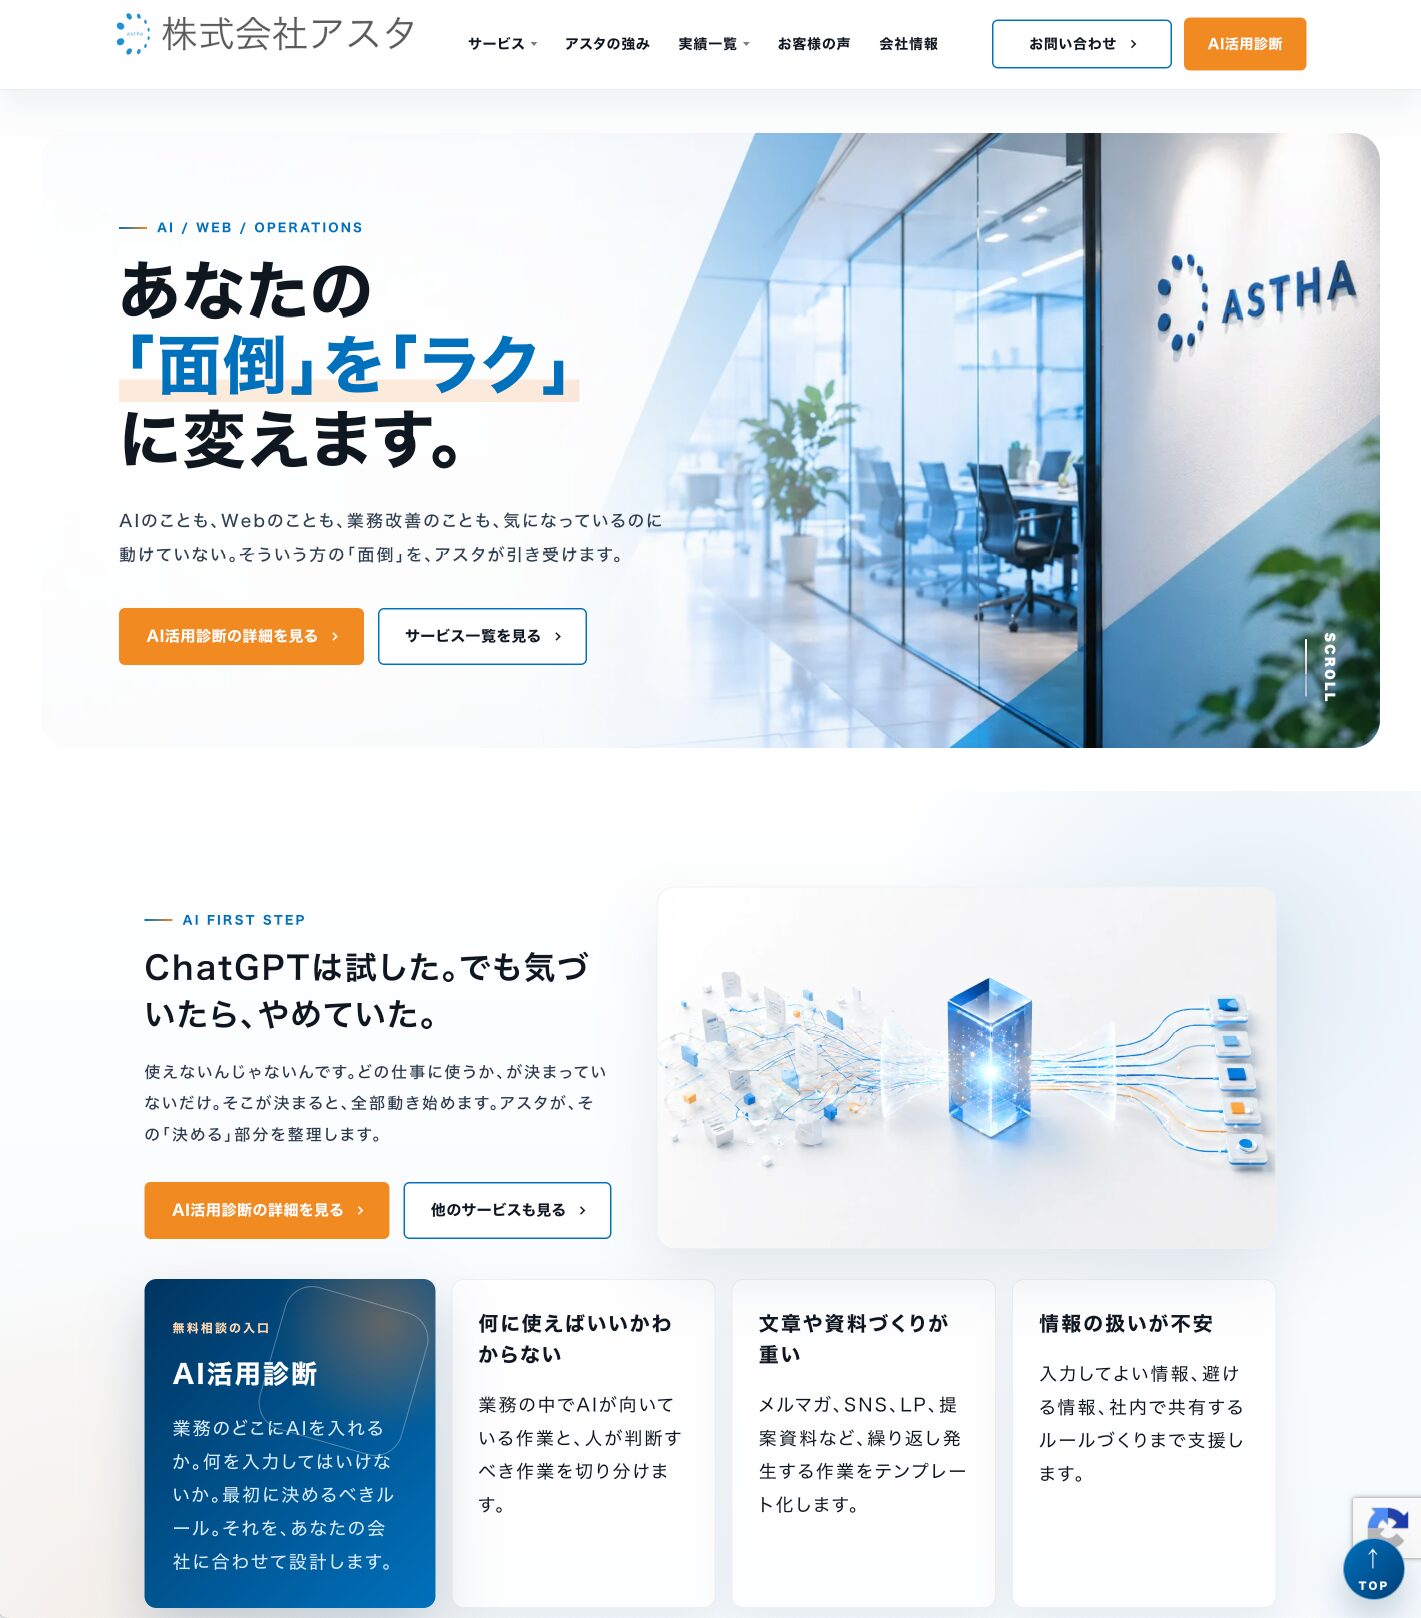
完成したサイトはこちら
リニューアルしたコーポレートサイトはこちらです。
ぜひ、実際に見てみてください。
あなたのビジネスでも、同じことができます
今回のような「AI活用設計」を、自社のWebサイトや業務でも試してみたい方はお気軽にご相談ください。
▼ 画像をクリックするとメルマガ登録ページに移動します。
The post 【リサーチ・デザイン・実装】すべての工程をAIで進めた自社サイトリニューアルの話 first appeared on アスタWorks.
]]>


 完全自動投稿には注意が必要です